
 French
 Deutsch
Road signs in New Zealand
.jpg)
Road signs in New Zealand are similar to those set by the Vienna Convention on Road Signs and Signals. While New Zealand is not a signatory to the convention, its road signs are generally close in shape and function. New Zealand uses yellow diamond-shaped signs for warnings in common with Australia, the Americas, Ireland, Japan and Thailand. Speed limit signs are a red circle with a white background and the limitation in black, and are in kilometres per hour. There are also some signs unique to New Zealand. Road signs in New Zealand are controlled by NZ Transport Agency Waka Kotahi and are prescribed in the Land Transport Rule: Traffic Control Devices 2004 and set out in the Traffic Control Devices (TCD) Manual.[1]
Most of these signs were only introduced between 1987 and 1990, replacing older-style signs with white text on black backgrounds - square with a red border for regulatory signs and diamond with a yellow border. Warning signs and the Give Way sign were replaced from 1987, regulatory signs from 1989, and parking signs from 1990.[2] The only signs that remained the same were the Stop sign and the speed limit sign (although the "km/h" legend from metrication was removed). Some of the older signs can still be seen on some rural roads. New Zealand drives on the left.
Speed limits are posted in multiples of 10 kilometres per hour [km/h] (6.2 mph), and range from 10–110 km/h (6–68 mph), with 110 km/h being the maximum legal speed for motor vehicles in New Zealand. The Manual of Traffic Signs and Markings specifies that advisory speeds (PW-25) always end in digit "5", however there are some advisory speed signs that do not comply with the Manual and end in zero.[3]
In 2023, the then Labour government made moves to have Bilingual road signs with English and Māori in New Zealand.[4][5] One poll found 48% of the New Zealand public supported the idea, with 44% opposing. Another poll found 32% were in support and opposition was at 45%.[6][7]
Regulatory signs[edit]
-
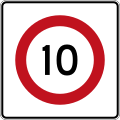
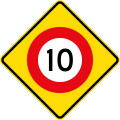
 (R1-1) 10 km/h speed limit (2016–present)
 -
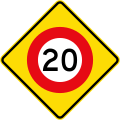
 (R1-1) 20 km/h speed limit (2016–present)
 -
 (R1-1) 30 km/h speed limit (2016–present)
 -
 (R1-1) 40 km/h speed limit (2016–present)
 -
 (R1-1) 50 km/h speed limit (2016–present)
 -
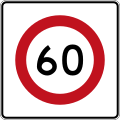
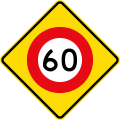
 (R1-1) 60 km/h speed limit (2016–present)
 -
 (R1-1) 70 km/h speed limit (2016–present)
 -
 (R1-1) 80 km/h speed limit (2016–present)
 -
 (R1-1) 90 km/h speed limit (2016–present)
 -
 (R1-1.1) 100 km/h speed limit
 -
 (R1-1.2) 110 km/h speed limit (2017–present)
 -
 (R1-2) 60 km/h variable speed limit
 -
 (R1-2) 60 km/h variable speed limit
 -
 (R1-2.1) 60 km/h variable speed limit
 -
 (R1-3) Speed Limit Derestriction (no posted speed limit, maximum of 100 km/h applies but drive to conditions)
 -
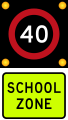 (R1-6) 40 km/h school zone speed limit in effect when flashing
 -
 (R1-6) 40 km/h school zone speed limit in effect when flashing
 -
 (R1-6.1) 30 km/h school zone speed limit in effect during times specified
 -
 (R1-8) Temporary sign (added to speed limit signs to indicate the limit is only temporary)
 -
 (R1-8.1) Temporary sign (added to speed limit signs to indicate the limit is only temporary)
 -
 (R1-8.1) 10 km/h speed limit
 -
 (R1-8.1) 20 km/h speed limit
 -
 (R1-8.1) 30 km/h speed limit
 -
 (R1-8.1) 40 km/h speed limit
 -
 (R1-8.1) 50 km/h speed limit
 -
 (R1-8.1) 60 km/h speed limit
 -
 (R1-8.1) 70 km/h speed limit
 -
 (R1-8.1) 80 km/h speed limit
 -
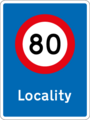
 (R1-5.1) Locality speed limit
 -
 (R1-5.2) Locality speed limit
 -
 (R2-1) Stop
 -
 (R2-2) Give Way
 -
 (R2-2) Fluorescent version
 -
 (R2-2.2) Straight Ahead Traffic (added to R2-2)
 -
 (R2-2.3) Right Turning Traffic (added to R2-2)
 -
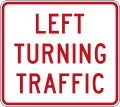 (R2-2.4) Left Turning Traffic (added to R2-2)
 -
 (R2-2.5) To Cyclists (added to R2-2)
 -
 (R2-2.6) To Cyclists and Pedestrians (added to R2-2)
 -
 (R2-3) Give Way at Roundabout (give way to vehicles coming from the right)
 -
 (R2-3) Fluorescent version
 -
 (R2-4) School Patrol Stop (used by crossing wardens when children are crossing the street, vehicles must stop)
 -
 (R2-4) Perforated version
 -
 (R2-6) Stop on Red Signal (used at traffic lights)
 -
 (R2-6.2) Stop Here on Red Signal (used at traffic lights)
 -
 (R2-7) Give Way to Oncoming Vehicles (used at traffic bottleneck points)
 -
 (R2-7.1) Give Way (added to R2-7) (used at traffic bottleneck points, such as one-way bridges)
 -
 (R2-7.1) Give Way (version from 2009 onwards, added to R2-7) (used at traffic bottleneck points, such as one-way bridges)
 -
 (R2-8) Priority Over Oncoming Vehicles (used at traffic bottleneck points, such as one-way bridges)
 -
 (R2-9) Turning Traffic Give Way To Pedestrians
 -
 (R2-9.1) Turning Traffic Give Way To Cyclists
 -
 (R2-9.2) Straight Ahead Traffic Give Way To Cyclists
 -
 (R2-10) One Vehicle per Green each lane (used underneath ramp meters on motorway on-ramps)
 -
 (R3-1) No Left Turn
 -
 (R3-2) No Right Turn
 -
 (R3-3) No U-turn
 -
 (R3-4) No Entry (do not enter from this point)
 -
 (R3-5.1) Except Buses
 -
 (R3-5.2) Except Cycles
 -
 (R3-5.3) Except Authorised Vehicles
 -
 (R3-6) Road Closed
 -
 (R3-7) Wrong Way
 -
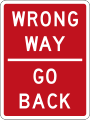 (R3-7.1) Wrong Way - Go Back (commonly used on motorway off-ramps)
 -
 (R3-8) Turn Left
 -
 (R3-9) Proceed Straight Ahead (no turns allowed)
 -
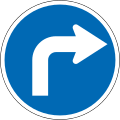 (R3-10) Turn Right
 -
 (R3-11) Turn Left or Right
 -
 (R3-12) One-way traffic (pointing left)
 -
 (R3-12) One-way traffic (pointing right)
 -
 (R3-13) Keep Left
 -
 (R3-13.1) Keep Left (narrow version)
 -
 (R3-13.1) Keep Left (narrow version)
 -
 (R3-13.2) Keep Right
 -
 (R3-13.3) Keep Right (narrow version)
 -
 (R4-1) This Lane Must Turn Left
 -
 (R4-1) This Lane Must Turn Right
 -
 (R4-2) This Lane Must Proceed Straight
 -
 (R4-3) This Lane May Proceed Straight or Turn Left
 -
 (R4-3) This Lane May Proceed Straight or Turn Right
 -
 (R4-4) Traffic may use the Below Lane - National Speed Limit applies (Used on motorways where variable speed limits usually apply, but are inactive at the time.)
 -
 (R4-4ALT) Traffic may use the Below Lane (Variable sign used when Dynamic Lanes are in use, and in some motorway tunnels.)
 -
 (R4-5L) Lane Closure Ahead - Traffic merge left (Used on motorways where variable lane control is used.)
 -
 (R4-5R) Lane Closure Ahead - Traffic merge right (Used on motorways where variable lane control is used.)
 -
![(R4-5ALT) Only traffic using the next exit may use the below lane (Used on motorways where variable lane control is used.)[8]](//upload.wikimedia.org/wikipedia/commons/thumb/1/10/New_Zealand_Land_Control_R4-5_%28ALT%29.png/119px-New_Zealand_Land_Control_R4-5_%28ALT%29.png) (R4-5ALT) Only traffic using the next exit may use the below lane (Used on motorways where variable lane control is used.)[8]
(R4-5ALT) Only traffic using the next exit may use the below lane (Used on motorways where variable lane control is used.)[8] -
 (R4-6) Lane Closed - Traffic May Not use the Below Lane (Used on where variable lane control or Dynamic Lanes are used.)
 -
 (R4-7) Bus Lane
 -
 (R4-7.1) Buses Only
 -
 (R4-8.4) Transit Lane ends (T2 version)
 -
 (R4-8.4) Transit Lane ends (T3 version)
 -
 (R4-9) Cycle Lane
 -
 (R4-9.1) Cycles Only
 -
 (R4-10) Heavy Vehicle/Truck Lane
 -
 (R4-11) Shared Cycle and Pedestrian Path
 -
 (R4-11.1) Cyclists and Pedestrians Maintain Sides
 -
 (R4-11.2) Cyclists and Pedestrians Maintain Sides
 -
 (R4-12) Emergency Stopping Lane Only
 -
 (R4-12.1) Emergency Stopping Lane Only during times specified
 -
 (R4-12.2) Emergency Stopping Lane
 -
 (R4-13) Signal bypass transit lane for vehicles carrying 2 or more persons and heavy vehicles exceeding 3500 kilograms
 -
 (R4-13) Signal bypass transit lane for vehicles carrying 3 or more persons and heavy vehicles exceeding 3500 kilograms
 -
 (R4-13.1) Signal bypass transit lane for vehicles carrying 2 or more persons and heavy vehicles exceeding 3500 kilograms
 -
 (R4-13.1) Signal bypass transit lane for vehicles carrying 3 or more persons and heavy vehicles exceeding 3500 kilograms
 -
 (R4-13.2) Do not Stop for Signals
 -
 (R4-13.3a) Signals do not apply
 -
 (R4-13.3b) Signals do not apply
 -
 (R4-14) Bus and Electric Vehicle Lane
 -
 (R4-14.1) Buses and Electric Vehicles Only
 -
 (R4-14.2) Transit lane for vehicles carrying 2 or more persons and electric vehicles irrespective of the number of persons in the vehicle
 -
 (R4-14.3) Transit lane for vehicles carrying 3 or more persons and electric vehicles irrespective of the number of persons in the vehicle
 -
 (R4-14.4) Transit lane for vehicles carrying 2 or more persons, heavy vehicles exceeding 3500 kilograms and electric vehicles irrespective of the number of persons in the vehicle
 -
 (R4-14.5) Transit lane for vehicles carrying 3 or more persons, heavy vehicles exceeding 3500 kilograms and electric vehicles irrespective of the number of persons in the vehicle
 -
 (R5-1) No Cycles or Mopeds
 -
 (R5-2) No Pedestrians
 -
 (R5-3) No Heavy Vehicles/Trucks
 -
 (R5-4.1) Maximum Height Restriction
 -
 (R5-4.2) Maximum Height Restriction
 -
 (R5-5) Pedestrians Only (marks a pedestrian zone where motor vehicles are prohibited)
 -
 (R5-6) Cycles Must Exit
 -
 (R5-7) Class C road (Heavy vehicles can drive on this road only to deliver or collect goods or passengers along the road)
 -
 (R5-7.1) Class I road
 -
 (R5-7.2) Class I road until date specified
 -
 (R5-8) Maximum Length for Heavy Vehicles
 -
 (R5-10) Heavy vehicle axle weight limit
 -
 (R5-13A) No cruising zone
 -
 (R5-13.1A) No cruising zone begins
 -
 (R5-13.2A) No cruising zone ends
 -
 (R7-1) Keep Left Unless Passing (commonly used on passing lanes)
 -
 (R7-1) Keep Left Unless Passing (commonly used on passing lanes)
 -
 (R7-1) Keep Left Unless Passing (commonly used on passing lanes)
 -
 (R7-1.1) Use Left Lane Unless Passing (commonly used on passing lanes)
 -
 (R7-2) Regulatory sign effective ahead
 -
 (R7-2.1) Regulatory sign effective begins
 -
 (R7-2.2) Regulatory sign effective ends
 -
 (R7-2.1) Regulatory sign effective in 100 metres
 -
 (R7-2.2) Regulatory sign effective in 200 metres
 -
 (R7-2.3) Regulatory sign effective in 300 metres
 -
 Entry only
 -
 Entry
Entry -
 Exit
Exit
.svg)
.svg)
.svg)
.svg)
.svg)
.svg)
.svg)
.svg)
.svg)


.svg)
.gif)
.svg)


.svg)
.svg)
.svg)
.svg)
.svg)
.svg)
.svg)
.svg)


.svg)


.svg)


.png)

.png)
.png)
![(R4-5ALT) Only traffic using the next exit may use the below lane (Used on motorways where variable lane control is used.)[8]](/wiki/en/File:New_Zealand_Land_Control_R4-5_(ALT).png)


.svg)
.svg)


.svg)
.svg)
.svg)
.svg)


.svg)
.svg)
.svg)


.svg)
.svg)
.svg)


Parking[edit]
-
 (R6-10.1) No Stopping or standing
 -
 (R6-10.1) No Stopping (on the left of this sign)
 -
 (R6-10.1) No Stopping (on the right of this sign)
 -
 (R6-10.1) No Stopping (on both sides of this sign)
 -
 (RP-1.1) No Stopping (on the left of this sign)
 -
 (RP-1.1) No Stopping (on the right of this sign)
 -
 (RP-1.1) No Stopping (on both sides of this sign)
 -
 (R6-10.2) No Stopping for 1 kilometre
 -
 (R6-10.2) No Stopping for 2 kilometres
 -
 (R6-10.2) No Stopping for 3 kilometres
 -
 (R6-10.2) No Stopping for 4 kilometres
 -
 (R6-10.2) No Stopping for 5 kilometres
 -
 (R6-11) No Stopping at times prescribed (on the left of this sign)
 -
 (R6-11) No Stopping at times prescribed (on the right of this sign)
 -
 (R6-11) No Stopping at times prescribed (on both sides of this sign)
 -
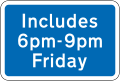
 (R6-11.1) Late Night Extension (added to R6-11)
 -
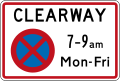 (R6-12.1) Clearway (No Stopping) (with single peak time)
 -
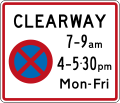 (R6-12.2) Clearway (No Stopping) (with two peak times)
 -
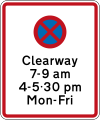 (R6-12.3) Clearway (No Stopping) during times specified
 -
 (R6-12.4) Clearway Begins
 -
 (R6-12.5) Clearway Ends
 -
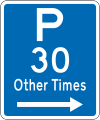
 (R6-30) Parking Permitted: 30 Minutes (on the left of this sign, standard hours)
 -
 (R6-30) Parking Permitted: 30 Minutes (on the right of this sign, standard hours)
 -
 (R6-30) Parking Permitted: 30 Minutes (on both sides of this sign, standard hours)
 -
 (R6-30) Parking Permitted: 60 Minutes (on the left of this sign, standard hours)
 -
 (R6-30) Parking Permitted: 60 Minutes (on the right of this sign, standard hours)
 -
 (R6-30) Parking Permitted: 60 Minutes (on the both sides of this sign, standard hours)
 -
 (R6-30) Parking Permitted: 120 Minutes (on the left of this sign, standard hours)
 -
 (R6-30) Parking Permitted: 120 Minutes (on the right of this sign, standard hours)
 -
 (R6-30) Parking Permitted: 120 Minutes (on both sides of this sign, standard hours)
 -
 (R6-30.1) Late Night Extension
 -
 (R6-31) Parking Permitted: 30 Minutes (on the left of this sign, non-standard hours)
 -
 (R6-31) Parking Permitted: 30 Minutes (on the right of this sign, non-standard hours)
 -
 (R6-31) Parking Permitted: 30 Minutes (on both sides of this sign, non-standard hours)
 -
 (R6-32) Parking Permitted: 30 Minutes (on the left of this sign, other times)
 -
 (R6-32) Parking Permitted: 30 Minutes (on the right of this sign, other times)
 -
 (R6-32) Parking Permitted: 30 Minutes (on both sides of this sign, other times)
 -
 (R6-50.1) Good Vehicles Only
 -
 (R6-50.2) 5 Minute Maximum, Goods Vehicles Only
 -
 (R6-50.5) Loading Zone Parking: 5 Minutes
 -
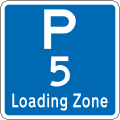
 (R6-50.5) Loading Zone Parking: 5 Minutes (on the left of this sign)
 -
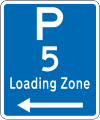
 (R6-50.5) Loading Zone Parking: 5 Minutes (on the right of this sign)
 -
 (R6-50.5) Loading Zone Parking: 5 Minutes (on both sides of this sign)
 -
 (R6-51) Motorcycle Parking
 -
 (R6-51.1) Motorcycle Parking (on the left of this sign)
 -
 (R6-51.1) Motorcycle Parking (on the right of this sign)
 -
 (R6-51.1) Motorcycle Parking (on both sides of this sign)
 -
 (R6-52) Cycle Parking
 -
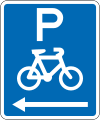 (R6-52.1) Cycle Parking (on the left of this sign)
 -
 (R6-52.1) Cycle Parking (on the right of this sign)
 -
 (R6-52.1) Cycle Parking (on both sides of this sign)
 -
 (R6-53) Bus Parking: No Limit
 -
 (R6-53.1) Bus Parking: No Limit (on the left of this sign)
 -
 (R6-53.1) Bus Parking: No Limit (on the right of this sign)
 -
 (R6-53.1) Bus Parking: No Limit (on both sides of this sign)
 -
 (R6-53.2.1) Bus Parking: Time Limit
 -
 (R6-53.2.1) Bus Parking: Time Limit (on the left of this sign)
 -
 (R6-53.2.1) Bus Parking: Time Limit (on the right of this sign)
 -
 (R6-53.2.1) Bus Parking: Time Limit (on both sides of this sign)
 -
 (R6-53.2.2) Bus Parking: Non-standard Hours (on the left of this sign)
 -
 (R6-53.2.2) Bus Parking: Non-standard Hours (on the right of this sign)
 -
 '(R6-53.2.2) Bus Parking: Non-standard Hours (on both sides of this sign)
 -
 (R6-53.3) Tour Coaches Only
 -
 (R6-54) Shuttle Parking: No Limit
 -
 (R6-54.1) Shuttle Parking: No Limit (on the left of this sign)
 -
 (R6-54.1) Shuttle Parking: No Limit (on the right of this sign)
 -
 (R6-54.1) Shuttle Parking: No Limit (on both sides of this sign)
 -
 (R6-54.2) Shuttle Parking: Time Limit
 -
 (R6-54.2) Shuttle Parking: Time Limit (on the left of this sign)
 -
 (R6-54.2) Shuttle Parking: Time Limit (on the right of this sign)
 -
 (R6-54.2) Shuttle Parking: Time Limit (on both sides of this sign)
 -
 (R6-55) Disabled Parking: No Limit
 -
 (R6-55.1) Disabled Parking: No Limit (on the left of this sign)
 -
 (R6-55.1) Disabled Parking: No Limit (on the right of this sign)
 -
 (R6-55.1) Disabled Parking: No Limit (on both sides of this sign)
 -
 (R6-55.2) Disabled Parking: Time Limit
 -
 (R6-55.2) Disabled Parking: Time Limit (on the left of this sign)
 -
 (R6-55.2) Disabled Parking: Time Limit (on the right of this sign)
 -
 (R6-55.2) Disabled Parking: Time Limit (on both sides of this sign)
 -
 (R6-70) No Parking
 -
 (R6-71) No Parking: Bus Stop
 -
 (R6-71.1) No Parking: Bus Stop (on the left of this sign)
 -
 (R6-71.1) No Parking: Bus Stop (on the right of this sign)
 -
 (R6-71.1) No Parking: Bus Stop (on both sides of this sign)
 -
 (R6-71B) No Parking: Bus Stop
 -
 (R6-71.1B) No Parking: Bus Stop (on the left of this sign)
 -
 (R6-71.1B) No Parking: Bus Stop (on the right of this sign)
 -
 (R6-71.1B) No Parking: Bus Stop (on both sides of this sign)
 -
 (R6-72.2) No Parking: Coach Stop
 -
 (R6-72.2) No Parking: Coach Stop (on the left of this sign)
 -
 (R6-72.2) No Parking: Coach Stop (on the right of this sign)
 -
 (R6-72.2) No Parking: Coach Stop (on both sides of this sign)
 -
 (R6-72) No Parking: Taxi Stand
 -
 (R6-72.1) No Parking: Taxi Stand (on the left of this sign)
 -
 (R6-72.1) No Parking: Taxi Stand (on the right of this sign)
 -
 (R6-72.1) No Parking: Taxi Stand (on both sides of this sign)
 -
 (R6-73) No Parking: Shuttle Stop
 -
 (R6-73.1) No Parking: Shuttle Stop (on the left of this sign)
 -
 (R6-73.1) No Parking: Shuttle Stop (on the right of this sign)
 -
 (R6-73.1) No Parking: Shuttle Stop (on both sides of this sign)
 -
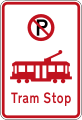 (R6-74) No Parking: Tram Stop
 -
 (R6-74.1) No Parking: Tram Stop (on the left of this sign)
 -
 (R6-74.1) No Parking: Tram Stop (on the right of this sign)
 -
 (R6-74.1) No Parking: Tram Stop (on both sides of this sign)
 -
 (R6-79) No Parking: Emergency Vehicle Stop
 -
 (R6-79.1) No Parking: Emergency Vehicle Stop (on the left of this sign)
 -
 (R6-79.1) No Parking: Emergency Vehicle Stop (on the right of this sign)
 -
 (R6-79.1) No Parking: Emergency Vehicle Stop (on both sides of this sign)
 -
 (RP-3.4) Clearway During Prescribed Days
 -
 (RP-11) Coupon Parking Zone Begins
 -
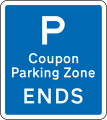 (RP-11) Coupon Parking Zone Ends
 -
 (RP-12) Coupon Parking Zone (repeater sign)
 -
 Pay & Display Parking
 -
 Vehicles With Permits Exempt
 -
 Parking For Authorised Vehicles Only


.svg)
.svg)
.svg)
.svg)


.svg)
.svg)


General advisory[edit]
-
 (A40-1) No Exit
 -
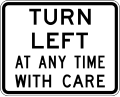 (A40-2) Left Turn At Any Time With Care (usually used on slip lanes)
 -
 (A40-3) Warning Bells At Railway Crossing Turned Off (at times prescribed)
 -
 (A41-3) Construction Zone (to the left)
 -
 (A41-3) Construction Zone (to the right)
 -
 (A41-4) Railway Not In Use
 -
 (A40-7) Shared Zone
 -
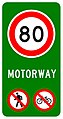 (A41-4) Motorway Begins (80 km/h speed limit)
 -
 (A41-4) Motorway Begins (100 km/h speed limit)
 -
 (A41-1) Motorway Begins
 -
 (A41-1.1) Motorway Begins
 -
 (A41-1.2) Motorway Ends 100M
 -
 (A41-1.3) Motorway Ends
 -
 (A41-1.3) Motorway Ends
 -
 (A41-4) Motorway Ends (30 km/h speed limit)
 -
 (A41-4) Motorway Ends (40 km/h speed limit)
 -
 (A41-4) Motorway Ends (50 km/h speed limit)
 -
 (A41-4) Motorway Ends (60 km/h speed limit)
 -
 (A41-4) Motorway Ends (70 km/h speed limit)
 -
 (A41-4) Motorway Ends (80 km/h speed limit)
 -
 (A41-4) Motorway Ends (90 km/h speed limit)
 -
 (A41-2) Expressway Begins
 -
 (A41-2.1) Expressway Begins
 -
 (A41-2.2) Expressway Ends 100M
 -
 (A41-2.3) Expressway Ends
 -
 (A41-2.3) Expressway Ends
 -
 (A45-1/IG-4) Heavy Vehicle By Pass Ahead (in 200 metres)
 -
 (A45-1/IG-4) Heavy Vehicle By Pass Ahead (in 300 metres)
 -
 (A45-2/IG-5) Heavy Vehicle By Pass (on left)
 -
 (A45-2/IG-5) Heavy Vehicle By Pass (on right)
 -
 (A42-1/IG-6) Passing Lane Ahead (in 200 metres)
 -
 (A42-1/IG-6) Passing Lane Ahead (in 300 metres)
 -
 (A42-1/IG-6) Passing Lane Ahead (in 400 metres)
 -
 (A42-1.1/IG-6.1) Passing Lane Ahead (in 1 kilometre)
 -
 (A42-1.1/IG-6.1) Passing Lane Ahead (in 2 kilometres)
 -
 (A42-2/IG-7) Passing Bay Ahead (in 50 metres)
 -
 (A42-2/IG-7) Passing Bay Ahead (in 100 metres)
 -
 (A42-2/IG-7) Passing Bay Ahead (in 150 metres)
 -
 (A42-2/IG-7) Passing Bay Ahead (in 200 metres)
 -
 (A42-2/IG-7) Passing Bay Ahead (in 300 metres)
 -
 (A42-3/IG-8) Slow Vehicle Bays (for the next 2 kilometres)
 -
 (A42-3/IG-8) Slow Vehicle Bays (for the next 5 kilometres)
 -
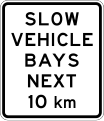 (A42-3/IG-8) Slow Vehicle Bays (for the next 10 kilometres)
 -
 (A42-4/IG-9) Slow Vehicle Bay Ahead (in 300 metres)
 -
 (A42-4/IG-9) Slow Vehicle Bay Ahead (in 1 kilometre)
 -
 (A42-4/IG-9) Slow Vehicle Bay Ahead (in 2 kilometres)
 -
 (A42-5/IG-10) Slow Vehicle Bay (indicator sign)
 -
 (A45-5/IG-17) Heavy Vehicles Please Do Not Use Engine Brakes (for the next 4 kilometres)
 -
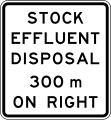
 (IG-18) Stock Effluent Disposal Point Ahead (on left, in 300 metres)
 -
 (IG-18) Stock Effluent Disposal Point Ahead (on right, in 300 metres)
 -
 (IG-18) Stock Effluent Disposal Point Ahead (turning left, in 300 metres)
 -
 (IG-18) Stock Effluent Disposal Point Ahead (turning right, in 300 metres)
 -
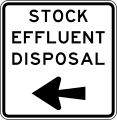 (IG-19) Stock Effluent Disposal Point (turn left)
 -
 (IG-19) Stock Effluent Disposal Point (turn right)
 -
 (IG-19) Stock Effluent Disposal Point (veer left)
 -
 (IG-19) Stock Effluent Disposal Point (veer right)
 -
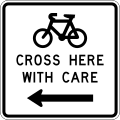 (A43-3) Cyclists Cross Here With Care (to the left)
 -
 (A43-3) Cyclists Cross Here With Care (to the right)
 -
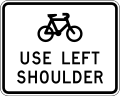 (A43-1) Cyclists Use Left Shoulder
 -
 (A43-2) Cyclists Use Ramp


_(obsolete;_white).svg)
_(obsolete;_white).svg)
.svg)
.svg)
_(obsolete).svg)
_(obsolete).svg)
_(obsolete).svg)
_(obsolete).svg)
_(obsolete).svg)
_(obsolete).svg)
_(obsolete).svg)
_(obsolete).svg)
_(obsolete).svg)
_(obsolete).svg)
_(obsolete).svg)
_(obsolete).svg)
_(obsolete).svg)
_(obsolete).svg)
_(obsolete).svg)
_(obsolete).svg)
.svg)
.svg)
.svg)
.svg)
.svg)
.svg)
.svg)
.svg)
.svg)
.svg)
.svg)
.svg)
.svg)
.svg)
Warning signs[edit]
Warning signs are yellow diamonds and thus follow the American MUTCD design.
-
 (W10-3) 10 km/h speed limit ahead
 -
 (W10-3) 20 km/h speed limit ahead
 -
 (W10-3) 30 km/h speed limit ahead
 -
 (W10-3) 40 km/h speed limit ahead
 -
 (W10-3) 50 km/h speed limit ahead
 -
 (W10-3) 60 km/h speed limit ahead
 -
 (W10-3) 70 km/h speed limit ahead
 -
 (W10-3) 80 km/h speed limit ahead
 -
 (W10-3) 90 km/h speed limit ahead
 -
 (W13-1.2) Above sign effective 50 metres ahead
 -
 (W13-1.2) Above sign effective 100 metres ahead
 -
 (W13-1.2) Above sign effective 150 metres ahead
 -
 (W13-1.2) Above sign effective 200 metres ahead
 -
 (W10-1/PW-1) Stop ahead
 -
 (W10-2/PW-2) Give Way ahead
 -
 (W10-4/PW-3) Traffic lights ahead
 -
 (W11-6/PW-4) Merging traffic from left
 -
 (W11-6/PW-4) Merging traffic from right
 -
 (W11-6.1) Merging traffic from both sides
 -
 (W14-1/PW-5) Road diverges (splits)
 -
 (W14-2/PW-6) Two-way traffic ahead
 -
 (W11-7) Lane gain on left
 -
 (W11-7) Lane gain on right
 -
 (W11-1/PW-8) Roundabout ahead
 -
 (W11-2/PW-9) Priority road straight ahead
 -
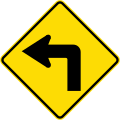
 (W11-2.1/PW-9.1) Priority road turns left
 -
 (W11-2.1/PW-9.1) Priority road turns right
 -
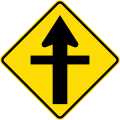
 (W11-3/PW-10) Controlled T-junction (priority turns left)
 -
 (W11-3/PW-10) Controlled T-junction (priority turns right)
 -
 (W11-3.1/PW-10.1) Uncontrolled T-junction
 -
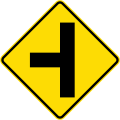
 (W11-4/PW-11) Controlled side road junction on left
 -
 (W11-4/PW-11) Controlled side road junction on right
 -
 (W11-4.1/PW-11.1) Uncontrolled side road junction on left
 -
 (W11-4.1/PW-11.1) Uncontrolled side road junction on right
 -
 (W11-5/PW-12) Controlled Y-junction on right
 -
 (W11-5/PW-12) Controlled Y-junction on left
 -
 (W11-5.1/PW-12.1) Uncontrolled Y-junction
 -
 (W15-1A/PW-13a) Railway level crossing on side road to left
 -
 (W15-1A/PW-13a) Railway level crossing on side road to right
 -
 (W15-1B/PW-13b) Railway level crossing on side road to left
 -
 (W15-1B/PW-13b) Railway level crossing on side road to right
 -
 (W15-1.1/PW-13.1) Railway level crossing on side road to left
 -
 (W15-1.1/PW-13.1) Railway level crossing on side road to right
 -
 (W15-2/PW-13.2) Railway level crossing on controlled T-junction to left
 -
 (W15-2/PW-13.2) Railway level crossing on controlled T-junction to right
 -
 (W15-2.1/PW-13.3) Railway level crossing on uncontrolled T-junction to left
 -
 (W15-2.1/PW-13.3) Railway level crossing on uncontrolled T-junction to right
 -
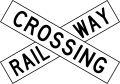 (W15-3/PW-14) Railway Crossbuck
 -
 (W15-3.1/PW-14b) Railway Crossbuck (with red backing board)
 -
 (W12-1.1/PW-16) 90 degree curve, to left
 -
 (W12-1.1/PW-16) 90 degree curve, to right
 -
 (W12-1.2/PW-17) Curve between 15 and 90 degrees, to left
 -
 (W12-1.2/PW-17) Curve between 15 and 90 degrees, to right
 -
 (W12-1.3/PW-18) Sharp curve between 90 and 120 degrees, to left
 -
 (W12-1.3/PW-18) Sharp curve between 90 and 120 degrees, to right
 -
 (W12-1.4/PW-19) Dangerous curve greater than 120 degrees, to left
 -
 (W12-1.4/PW-19) Dangerous curve greater than 120 degrees, to right
 -
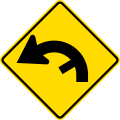
 (W12-2.1/PW-20) Reverse curve less than 60 degrees, to left
 -
 (W12-2.1/PW-20) Reverse curve less than 60 degrees, to right
 -
 (W12-2.2/PW-21) Reverse curve greater than 60 degrees, to left
 -
 (W12-2.2/PW-21) Reverse curve greater than 60 degrees, to right
 -
 (W12-2.3/PW-22) Reverse curve with decreasing radius, to left
 -
 (W12-2.3/PW-22) Reverse curve with decreasing radius, to right
 -
 (W12-2.4/PW-23) Series of curves ahead, first to left
 -
 (W12-2.4/PW-23) Series of curves ahead, first to right
 -
 (W12-3.1/PW-24) Sign effective for the next 2 kilometres
 -
 (W12-3.1/PW-24) Sign effective for the next 3 kilometres
 -
 (W12-3.1/PW-24) Sign effective for the next 4 kilometres
 -
 (W12-3.1/PW-24) Sign effective for the next 5 kilometres
 -
 (W12-3.1/PW-24) Sign effective for the next 6 kilometres
 -
 (W12-3.1/PW-24) Sign effective for the next 7 kilometres
 -
 (W12-3.1/PW-24) Sign effective for the next 8 kilometres
 -
 (W12-3.1/PW-24) Sign effective for the next 9 kilometres
 -
 (W12-3.1/PW-24) Sign effective for the next 10 kilometres
 -
 (W12-3.1/PW-24) Sign effective for the next 15 kilometres
 -
 (W12-3.1/PW-24) Sign effective for the next 20 kilometres
 -
 (W12-3.1/PW-24) Sign effective for the next 25 kilometres
 -
 (W12-3.2/PW-25) Advisory speed: 15 km/h
 -
 (W12-3.2/PW-25) Advisory speed: 25 km/h
 -
 (W12-3.2/PW-25) Advisory speed: 35 km/h
 -
 (W12-3.2/PW-25) Advisory speed: 45 km/h
 -
 (W12-3.2/PW-25) Advisory speed: 55 km/h
 -
 (W12-3.2/PW-25) Advisory speed: 65 km/h
 -
 (W12-3.2/PW-25) Advisory speed: 75 km/h
 -
 (W12-3.2/PW-25) Advisory speed: 85 km/h
 -
 (W12-3.2/PW-25) Advisory speed: 95 km/h
 -
 (PW-26) Curve between 15 and 90 degrees with minor road, to left
 -
 (PW-26) Curve between 15 and 90 degrees with minor road, to right
 -
 (PW-26) Curve between 90 and 120 degrees with minor road, to left
 -
 (PW-26) Curve between 90 and 120 degrees with minor road, to right
 -
 (PW-26) Concealed
 -
 Truck advisory speed (danger of rollover if speed is exceeded)
 -
 Truck advisory speed (danger of rollover if speed is exceeded)
 -
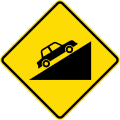
 (W14-9.1/PW-27) Steep descent
 -
 (W14-10.1/PW-27) Steep ascent
 -
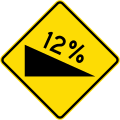 (W14-9) Steep descent (with grade)
 -
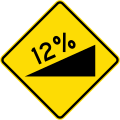 (W14-10) Steep ascent (with grade)
 -
 Use lower gear
 -
 (W14-9.2/PW-28) Trucks use lower gear
 -
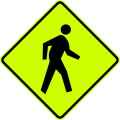 (W16-1/PW-29) Watch for pedestrians crossing
 -
 (W16-1/PW-29) Watch for pedestrians crossing
 -
 (W16-5.3/PW-29.1) Watch for aged pedestrians
 -
 (PW-29.1/W16-5.3) Watch for aged pedestrians
 -
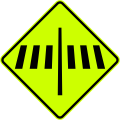 (W16-2/PW-30) Crosswalk ahead
 -
 (W16-2/PW-30) Crosswalk ahead
 -
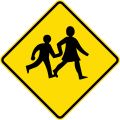
 (W16-4/PW-31) Watch for children crossing
 -
 (W16-4/PW-31) Watch for children crossing
 -
 (PW-31.1) Kindergarten zone
 -
 (PW-31.1) Kindergarten zone
 -
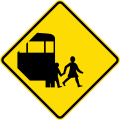
 (PW-34/W16-6) Watch for school buses
 -
 (W16-6/PW-34) Watch for school buses
 -
 (W16-6.1/PW-34.1) School bus route
 -
 (W16-6.1/PW-34.1) School bus route
 -
 (W16-6.2/PW-34.2) School bus turning area
 -
 (W16-6.2/PW-34.2) School bus turning area
 -
 (W16-7/PW-35) Watch for cyclists
 -
 (W16-7/PW-35) Watch for cyclists
 -
 (PW-36) Watch for horses
 -
 (W16-8/PW-36) Watch for horses
 -
 (W18-3.1) Watch for animals (cattle)
 -
 (W18-3.2) Watch for animals (sheep)
 -
 (W18-3.3) Watch for animals (deer)
 -
 (W18-3.4) Watch for animals (wild horses)
 -
 (W18-3.5) Watch for animals (seals)
 -
 (W18-3.6) Watch for animals (pūkeko)
 -
 (W18-3.7) Watch for animals (ducks)
 -
 (W18-3.8) Watch for animals (penguins)
 -
 (W18-3.9) Watch for animals (kiwi)
 -
 (W18-3.10) Watch for animals (kererū)
 -
 (W14-3/PW-38) Road dip
 -
 (W14-4/PW-39) Speed bump/road bump
 -
 (W14-5/PW-40) Uneven road
 -
 (W14-7/PW-41) Slippery road
 -
 (W14-7.1/PW-41.1) Road slippery when frosty
 -
 (W14-7.2/PW-41.2) Road slippery when wet
 -
 (W14-7.3/PW-41.3) Road has slippery gravel surface
 -
 (W14-7.4) Loose road surface (danger of stir up)
 -
 (W14-6/PW-42) Falling rocks or debris on left
 -
 (W14-6/PW-42) Falling rocks or debris on right
 -
 (W13-1/PW-43) Road narrows on left
 -
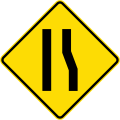 (W13-1/PW-43) Road narrows on right
 -
 (W13-1.1/PW-43.1) Road narrows on both sides
 -
 (W13-2/PW-44) Narrow bridge
 -
 (PW-44.1) Narrow Bridge, wide vehicles use caution
 -
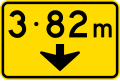
 (PW-45) Maximum overhead clearance ahead
 -
 (PW-46) Maximum height marker
 -
 (W13-5/PW-47) Overhead electrical cables
 -
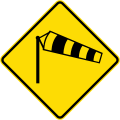 (W18-1/PW-48) Danger of powerful wind gusts
 -
 (W18-5/PW-49) Fire station
 -
 (W18-4/PW-50) Watch for trucks
 -
 (W18-6/PW-50.1) Watch for forklifts and other work vehicles
 -
 (W18-2/PW-51) Low-flying aircraft
 -
 (W18-2.1/PW-51.1) Low-flying helicopters
 -
 (W13-6/PW-52) Tunnel ahead
 -
 (W14-8/PW-53) Attention: Other Dangers! (never used alone, a supplementary plate will explain the danger)
 -
 (W14-8.1/PW-54) Ford
 -
 (W14-8.2/PW-55) Cattle stop
 -
 (W14-8.3/PW-56) Gate
 -
 (W15-5/PW-57) Uncontrolled railway crossing ahead
 -
 (W15-5/PW-57) Uncontrolled railway crossing ahead
 -
 (W15-6/PW-58) Controlled railway crossing ahead with signals and gates
 -
 (PW-59) Look both ways for trains before crossing
 -
 (W15-11) Cyclists take care on rail tracks
 -
 (W15-8.1/PW-60) Railway crossing ahead at a right angle
 -
 (W15-8.2/PW-60.1) Railway crossing ahead at an oblique angle
 -
 (W15-8.3/PW-60.2) Railway crossing ahead at an oblique angle
 -
 (W15-9/PW-63) Light rail crossing
 -
 (W15-9/PW-63) Light rail crossing
 -
 (W10-5.1/PW-64) Prepare to stop ahead
 -
 (W10-5.2/PW-64) Hidden queue ahead
 -
 (W10-5.3/PW-64) Queued vehicles ahead
 -
 (W16-3/PW-65) Belisha beacon
 -
 (PW-66) Curve marker with integrated advisory speed
 -
 (PW-66) Curve marker with integrated advisory speed
 -
 (PW-66) Curve marker with integrated advisory speed
 -
 (PW-66) Curve marker with integrated advisory speed
 -
 (W20-2/PW-67) Curve marker
 -
 (W20-2/PW-67) Curve marker
 -
 (W20-2/PW-67) Curve marker
 -
 (W20-1.2) End of road marker (used at T-junctions)
 -
 (W20-1.2) End of road marker (used at T-junctions)
 -
 (W20-1.1) Roundabout hazard marker


.svg)
.svg)
.svg)
.svg)
.svg)
.svg)
.svg)
.svg)
.svg)
.svg)
.svg)
.svg)
.svg)
.svg)
.svg)


.svg)
.svg)
.svg)


Vehicle Mounted[edit]
-
 School Bus signals (orange lights will flash when children are boarding and disembarking)
 -
 School Vehicle
 -
 School Bus (affixed to school buses)
 -
 School (affixed to school buses)
 -
 Danger - Slow Down
 -
 Pilot Vehicle (for an over-dimension convoy)
 -
 House Ahead (house-carrying truck convoy ahead)
 -
 House Follows (house-carrying truck follows behind pilot)
 -
 Long Load Ahead (extra-long vehicle convoy ahead)
 -
 Long Load Follows (extra-long vehicle convoy follows behind pilot)
 -
 Wide Load Ahead (extra-wide vehicle convoy ahead)
 -
 Wide Load Follows (extra-wide vehicle convoy follows behind pilot)


Temporary warning signs[edit]
-
 (T1A) Road Works Ahead
 -
 (T1A) Road Works Ahead
 -
 (TW-1.1) For the next 1 kilometre
 -
 (TW-1.1) For the next 1 kilometre
 -
 (TW-1.1) For the next 2 kilometres
 -
 (TW-1.1) For the next 2 kilometres
 -
 (TW-1.1) For the next 3 kilometres
 -
 (TW-1.1) For the next 3 kilometres
 -
 (TW-1.1) For the next 4 kilometres
 -
 (TW-1.1) For the next 4 kilometres
 -
 (TW-1.2.2) Wet tar
 -
 (TW-1.2.2) Wet tar
 -
 (TW-1.3) Grader
 -
 (TW-1.3) Grader
 -
 (TW-1.3) Mower
 -
 (TW-1.3) Mower
 -
 (TW-1.3) Skid testing
 -
 (TW-1.3) Skid testing
 -
 (TW-1.3) Weed sprayer
 -
 (TW-1.3) Weed sprayer
 -
 (TW-1.4) Road marking
 -
 (TW-1.4) Road marking
 -
 (TW-1.5) On side road
 -
 (TW-1.5) On side road
 -
 (TW-1.6) Shoulder closed
 -
 (TW-1.6) Shoulder closed
 -
 (TW-1.7) Surveying
 -
 (TW-1.7) Surveying
 -
 (TW-1.8) Bridge repairs
 -
 (TW-1.8) Bridge repairs
 -
 (TW-1B.1.1) Road workers ahead in 1 kilometre
 -
 (TW-1B.1.2) Road workers ahead in 2 kilometres
 -
 (TW-1B.2.1) Road workers ahead in 1 kilometre, delays possible
 -
 (TW-1B.2.2) Road workers ahead in 2 kilometres, delays possible
 -
 (TW-1B.3.1) Road works ahead in 1 kilometre
 -
 (TW-1B.3.2) Road works ahead in 2 kilometres
 -
 (TW-1B3(10) Road works speed limit ahead - 10 km/h
 -
 (TW-1B3(20) Road works speed limit ahead - 20 km/h
 -
 (TW-1B3(30) Road works speed limit ahead - 30 km/h
 -
 (TW-1B3(40) Road works speed limit ahead - 40 km/h
 -
 (TW-1B3(50) Road works speed limit ahead - 50 km/h
 -
 (TW-1B3(60) Road works speed limit ahead - 60 km/h
 -
 (TW-1B3(70) Road works speed limit ahead - 70 km/h
 -
 (TW-1B3(80) Road works speed limit ahead - 80 km/h
 -
 (TW-2) Attention - Other Dangers! (never used alone, a supplementary plate will explain the danger)
 -
 (TW-2) Attention - Other Dangers! (never used alone, a supplementary plate will explain the danger)
 -
 (TW-2.1) Flooding
 -
 (TW-2.1) Flooding


.svg)
.svg)
.svg)
.svg)
.svg)
.svg)
.svg)
.svg)

